Ever shared a link on LinkedIn only to see a broken image, a mismatched title, or a preview that just looks…off? It’s the kind of thing that makes you sad because you know first impressions matter, especially in a professional space.
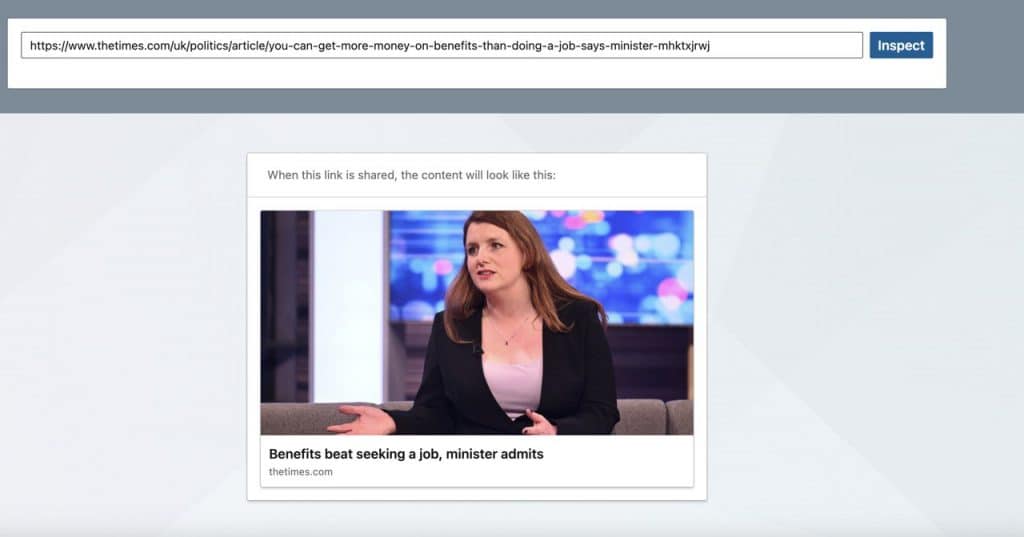
Now, imagine having a tool that can spot these issues instantly, tell you exactly what’s wrong, and help you fix it—all before your audience ever sees it. That’s exactly what LinkedIn’s free Post Inspector does.
Ready to see how it works? Let’s break it down.
What Is Post Inspector for LinkedIn?

LinkedIn Post Inspector is a powerful tool designed to ensure that links you share on LinkedIn display correctly and professionally.
Sometimes, shared links might show the wrong image, an outdated title, or missing metadata.
Whether it’s a link to your blog or another external resource, this tool helps you verify how the preview will appear to your audience.
Post Inspector, also known by an alternate name like LinkedIn Debugger. You can find an Open Graph Debugger, or Share URL Validator, for all social media to help you fix previews before sharing content.
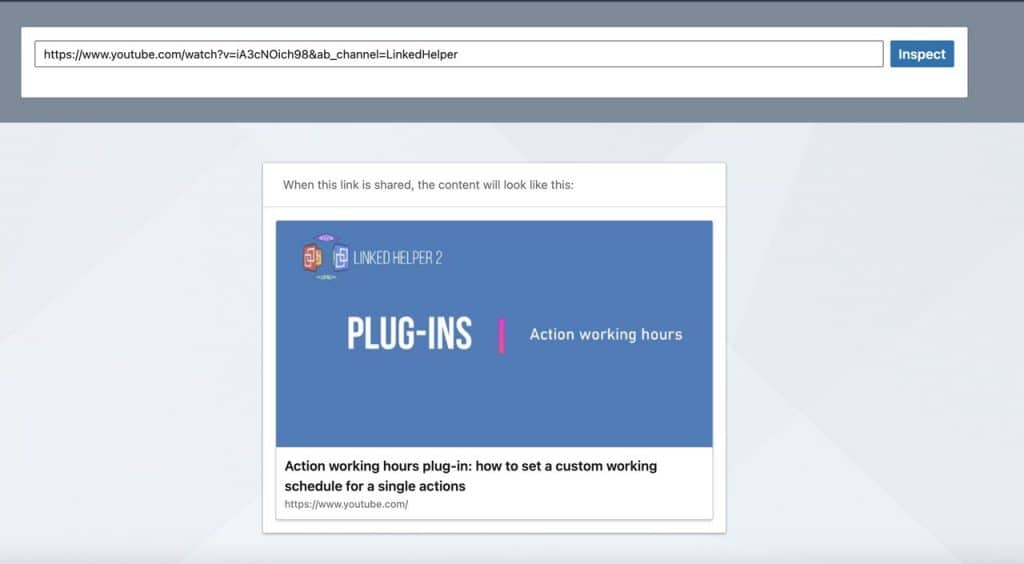
The tool allows you to see how your link preview will look before posting, ensuring accuracy and professionalism.
Why Use LinkedIn Post Inspector?
The Post Inspector is completely free and available to all LinkedIn users. Its primary benefit is improving the quality of your content by ensuring link previews look polished and trustworthy.
Since link previews (title, image, description) directly influence click-through rates, optimizing them is key to driving traffic and engagement.

If you want your content to stand out and your links to appear safe and compelling, LinkedIn Post Inspector is an indispensable tool.
LinkedIn Post Inspector is an essential tool for marketers and professionals looking to maintain a polished and professional presence on LinkedIn. Here’s why it’s a must-have:
- Make a Strong First Impression
The preview of your shared link is the first thing viewers see. If the preview image is missing, the title is irrelevant, or the content seems unclear, it can harm the perception of your post. A professional and accurate preview builds trust and draws users to your content. - Drive More Clicks to Your Link
Whether you’re promoting a blog, landing page, or product page, an optimized link preview increases the likelihood of clicks. Even UTM links can be enhanced by ensuring the title, image, and description are engaging and relevant. - Fix Broken Preview
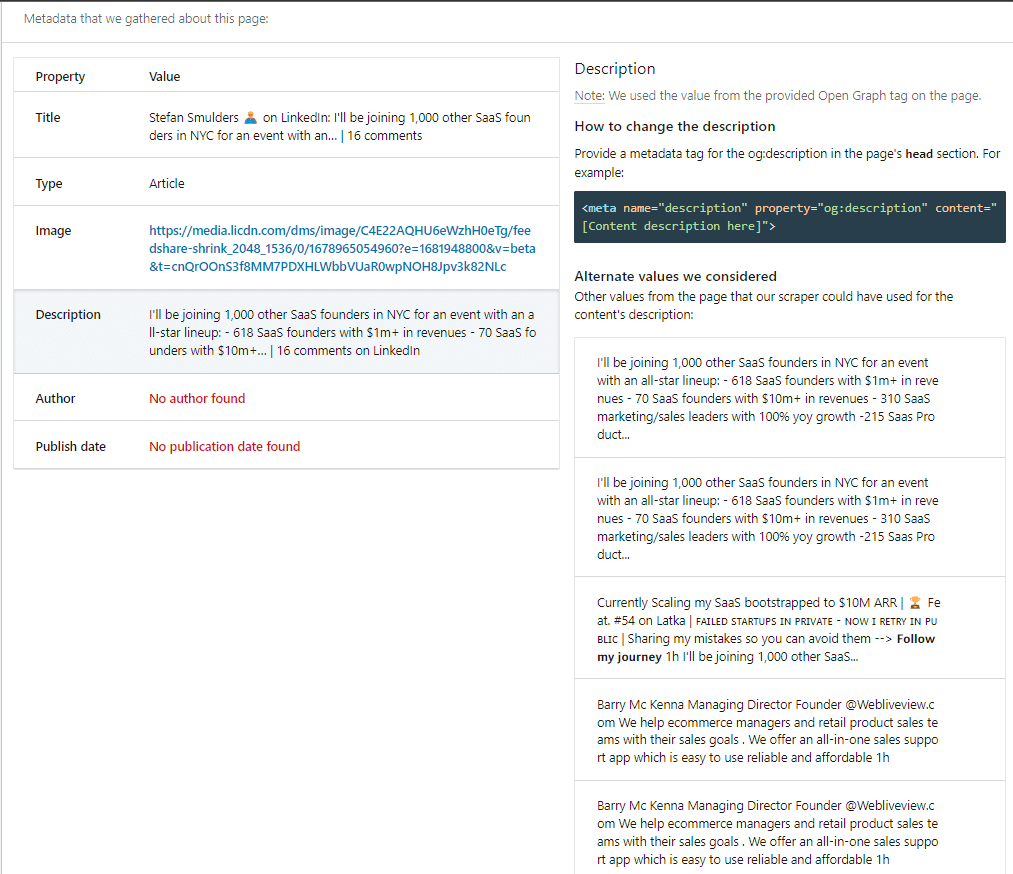
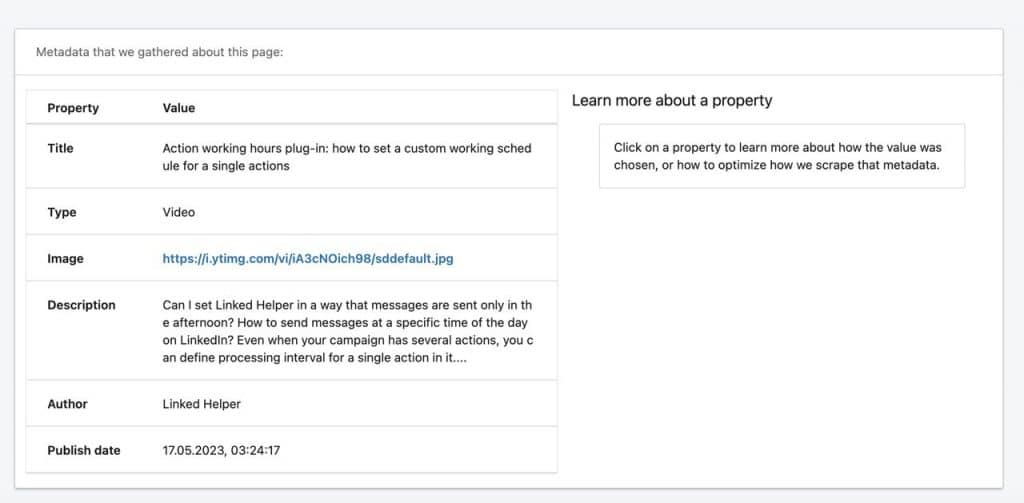
It shows you the title and image that LinkedIn will display. It also shows you how you can change it if you want to using HTML. It suggests some alternative titles/images that could be used. - Refresh Outdated Previews
When you update your website or article, LinkedIn might still display old data due to caching (which can last up to 7 days). The Post Inspector refreshes this data, ensuring your audience always sees the most up-to-date content. - Maintain a Professional Reputation
As a marketer or professional, your content reflects your brand. Using this tool guarantees your shared links look polished, with correct titles, images, and descriptions, boosting engagement and credibility on LinkedIn.
Whether you’re sharing links for thought leadership, lead generation, or direct sales, LinkedIn Post Inspector ensures your content is presented at its best. It’s quick, efficient, and absolutely essential for serious LinkedIn users!
How Does LinkedIn Post Inspector Work?
This tool operates based on key Open Graph (OG) tags — metadata embedded in the HTML of the page you submit for inspection. Let’s dive deeper and explore which tags are crucial for LinkedIn link debugger.
Explanation of Key Tags
Open Graph (OG) meta tags are HTML attributes used to control how content is displayed when shared on social media platforms, including LinkedIn. These tags allow content creators to customize titles, images, and descriptions, ensuring a polished and engaging appearance for links.
- og:title:
- Specifies the title of the shared content.
- Example: <meta property=”og:title” content=”The Ultimate Guide to LinkedIn Marketing” />
- og:image:
- Determines the thumbnail image shown with the link preview.
- Should be a high-resolution image for better visibility.
- Example: <meta property=”og:image” content=”https://example.com/image.jpg” />
- og:description:
- Provides a brief description of the content.
- Example: <meta property=”og:description” content=”Learn the best practices for LinkedIn marketing and engagement.” />
- og:url:
- Ensures the canonical URL of the page is shared, preventing duplicate content issues.
- Example: <meta property=”og:url” content=”https://example.com/linkedin-guide” />
- og:type:
- Defines the type of content (e.g., website, article, video).
- Example: <meta property=”og:type” content=”article” />
- og:locale:
- Specifies the language of the content.
- Example: <meta property=”og:locale” content=”en_US” />
How the LinkedIn Post Inspector Interacts with These Tags
The LinkedIn link checker fetches and analyzes the Open Graph meta tags from the provided URL. It simulates how LinkedIn’s platform will display the link when shared.
- Metadata Extraction: The tool scans the webpage’s source code for OG meta tags and uses the information to generate the preview.
- Error Identification: If tags are missing, incomplete, or incorrect, the tool highlights these issues.
- Cache Refresh: When an updated version of the page (e.g., a new title or image) needs to be reflected, the Post Inspector clears LinkedIn’s cache for that URL and regenerates the preview using updated metadata.
Example Use Case
You’ve shared a link to your blog, but the image is outdated. By entering the URL into the LinkedIn Post Inspector, you can refresh the cache. The tool retrieves the updated og:image tag, ensuring the new thumbnail displays correctly in posts.
Step-by-Step Guide to Using LinkedIn Post Inspector
On Desktop
1. Access the LinkedIn Post Inspector tool via the LinkedIn Marketing Developer Platform.
2. Paste the desired URL into the input box.

3. Click “Inspect” to analyze the link.
4. Review the breakdown of metadata (title, image, description) and identify issues.

5. Make necessary adjustments on your website or content management system.
On Mobile
- Open a browser and search for “LinkedIn Post Inspector.”
- Enter the link into the tool’s input field.
- Tap “Inspect” and review the results.
Common Issues and Troubleshooting with LinkedIn Post Inspector
LinkedIn Post Inspector is a powerful tool, but users often encounter specific challenges while debugging and optimizing link previews.
Here’s a detailed breakdown of common issues and how to address them:
1. Outdated Previews
- Cause:
LinkedIn caches link data (title, image, and description) for up to seven days, causing previews to display outdated information even after changes are made to the webpage. - Solution:
- Use the Post Inspector to refresh LinkedIn’s cache for the URL.
- Alternatively, append a query string (e.g., ?updated) to the URL when sharing. This forces LinkedIn to treat the link as a new entry and bypass the cache.
- Example: If your original link is example.com/article, share example.com/article?updated.
2. Incorrect Metadata
- Cause:
Missing or improperly configured Open Graph tags (e.g., incomplete og:title, og:description, or og:image) can lead to poor-quality previews or missing information. - Solution:
- Double-check your Open Graph tags using LinkedIn Post Inspector.
- Update your webpage’s metadata in the <head> section.
- Re-inspect the link using LinkedIn Post Inspector to ensure the updates are applied.
- Pro tip: Test your tags locally or on staging sites to avoid last-minute errors.
3. Preview Image Problems
- Cause:
- Images that don’t meet LinkedIn’s size requirements.
- Missing or incorrectly set og:image tag.
- Use of images with excessive file size, which slows loading.
- Solution:
- Ensure the og:image tag specifies an image with a minimum resolution of 1200×627 pixels.
- Use lightweight, high-quality formats like JPEG or PNG to balance visual appeal and loading speed.
- Always define the og:image:width and og:image:height tags to help LinkedIn scale the image properly.
4. Best Practices for Optimizing Link Previews
To avoid these issues and ensure your links look professional and engaging, follow these tips:
- Proper Configuration of Open Graph Tags:
- og:title: Write a compelling title under 150 characters.
- og:description: Craft concise, impactful descriptions (around 2-3 sentences).
- og:image: Use high-resolution images with recommended dimensions.
- Test Before Sharing:
Use LinkedIn Post Inspector to verify the preview before posting publicly. This prevents last-minute errors and improves content quality. - Refresh Cached Data:
After updating your webpage, use Post Inspector to clear the cached preview and reflect the latest changes. - Preview Continuously:
Regularly review links, especially for recurring or evergreen content, to ensure metadata stays relevant and updated.
By following these steps, you can maintain polished and professional previews that enhance your content’s engagement and effectiveness on LinkedIn.
Bonus Tip: How to Grow Post Views
Once your post preview is polished and professional, the next step is to maximize its visibility and engagement. Here’s how you can achieve that:
1. Leverage “Boost Post” in Linked Helper
- What is Boost Post? This feature is designed to amplify your LinkedIn content’s visibility by engaging with your network in a targeted and strategic way. It helps increase organic views, expand your post’s reach, and maximize exposure to your audience.
- You can use Linked Helper to tag individuals in the comments section of your post. This is a subtle and effective way to share your content, especially when it offers solutions to specific problems your audience faces.
- How it works:
- Select people from your LinkedIn connections or search results.
- Linked Helper will automatically insert their tags into a comment on your post. This draws their attention without appearing intrusive.
- Ideal for tagging professionals in your niche or potential collaborators.
Note: If your post contains a link to external content, such as a blog article, Linked Helper can help you drive traffic to that resource. By tagging relevant people, you encourage them to visit your post and potentially click through to your blog, increasing overall engagement.
2. Tagging Second-Degree Connections in LinkedIn Comments
Engage with professionals outside your first-degree network by tagging them in the comments section of your posts. Here’s how:
- Identify Users: Collect profiles of users who interacted with similar posts in your niche or topic. Use “Boost Post” in Linked Helper as described below.
- Craft Relevant Comments: When posting, tag these users in a comment, such as:
“@Name, I remember you engaged with a post on [topic]. I thought this might interest you too.”
This strategy helps increase visibility and encourages meaningful discussions with a wider audience.
3. Engaging LinkedIn Post Likers
Users can identify individuals who liked their previous similar posts or similar posts by others. After collecting these profiles, they can engage with them in two ways:
- If they are already first-degree connections: Send a regular message, for example, “Hey, I see you liked [specific post], I thought you might be interested in this similar content.”
- If they are not yet connected: Send a connection invite first, followed by a personalized message like, “Hi, I noticed you liked [specific post], and I have something similar I think you’d enjoy.”
This strategy helps build meaningful connections and increase engagement with relevant audiences.
Key Points to Remember
- Value-Driven Content: Ensure your post or shared content provides value to the audience, addressing their pain points or offering actionable insights.
- Thoughtful Tagging: Avoid overusing tags or tagging unrelated individuals to maintain credibility.
- Automation Advantage: Linked Helper saves time by automating the tagging process, making your efforts more efficient while expanding your content’s reach.
By combining Linked Helper’s Boost Post feature with value-rich content and strategic tagging, you can significantly enhance the visibility and engagement of your LinkedIn posts.
Conclusion
LinkedIn offers a free tool that ensures your content looks professional and polished. If you’re sharing a post from your website or an external resource, you can use the LinkedIn Post Inspector to verify that it displays correctly for your target audience. It also allows you to promptly fix any errors or inconsistencies before posting.
The LinkedIn link checker works with all key HTML meta tags, providing precise recommendations for corrections. Once your content is optimized and ready to share, you can take it a step further by leveraging Linked Helper’s automation features.
For example, the “Boost Post” function can automatically tag targeted audience members in the comments section of your post, helping to increase engagement and drive more traffic to your content.