
Sales Navigator is a LinkedIn service that opens advanced filters to search for people and companies in the social network. This can be useful for lead generation, sales, and recruiting. An example of advanced filters can be seen below and you can find out more from the official source.
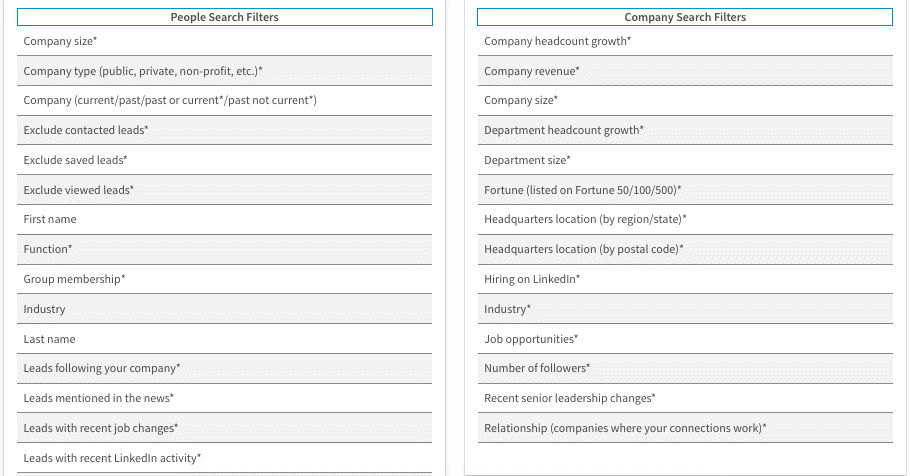
The Linked Helper scraper will help you parse profiles with more sensitive filters through the various Sales Navigator pages.
Why should you integrate Sales Navigator with Linked Helper?
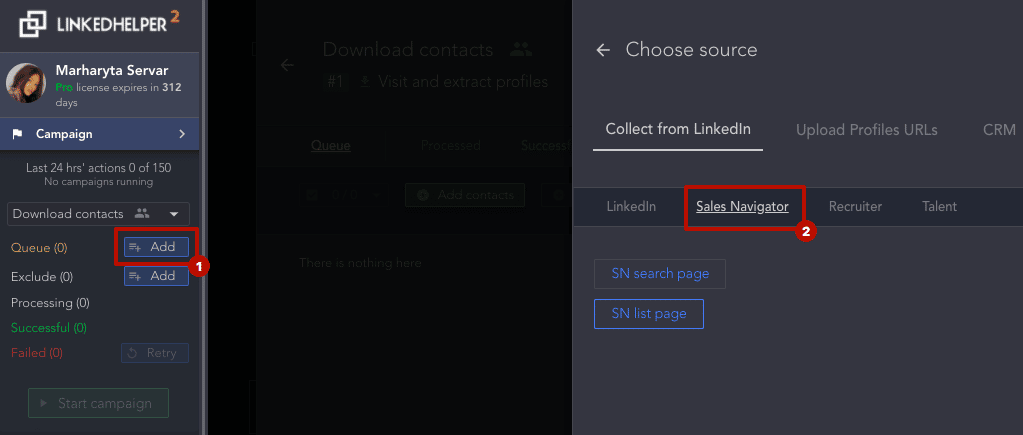
For example you can:
- Use the web scraper from the search page – a Sales Navigator subscription will allow you to set more precise criteria or exclude already processed leads, and Linked Helper can extract the collection.
- Use the list scraper for Sales Navigator – on the sales platform, you can generate lead lists. Just open the list via Linked Helper to transfer it to the memory of the CRM and download it to Excel.
By the way: Even if you end your subscription to Sales Navigator, all the lists of users and organizations you’ve created will remain available in the Linked Helper CRM’s memory. You can further assign auto-actions to these accounts.
More details on where the software can collect profiles from.
Of course, you can also use Linked Helper’s automation and web scraping with the basic LinkedIn service.
How the integration of Sales Navigator and LH will improve sales and lead generation:
- Auto-messages to leads. After collecting profiles and building targeted lists, you can send bulk messages via LH to all these people. For example, you can write or send a contact request to all group members – all your potential customers. Also, all messages can be personalized automatically – the tool will use data from the person’s page.
- Unified history of messages in the memory of the CRM. When you work in Sales Navigator via Linked Helper, all correspondence history will be saved even if you end your Sales Navigator subscription. All business data obtained through a paid plan can be transferred to the basic LinkedIn service, and you can also connect this profile to Linked Helper. Read more about tariff switching.
Sales Navigator scraper tutorial
#1 Download Linked Helper
This software will automate Sales Navigator actions and help speed up the collection of leads’ contact information and outreach. You can test the software for 14 days for free. After installation, log into your Sales Navigator account and start scraping. You can choose different sources for collecting profiles.
Read the full manual on finding people through Sales Navigator and the ability to write bulk messages to everyone.
#2 Start a Campaign
You can choose various Linked Helper actions to parse profiles. To do this, create a campaign and navigate to the Workflow section. The image below shows a partial list of actions that you can perform with Sales Navigator contacts.
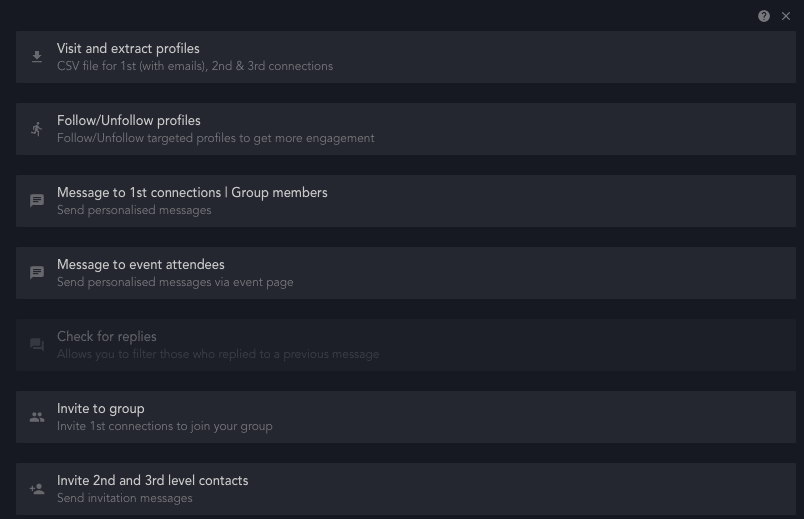
For example, you can start a campaign with the Visit & Extract profiles or Follow/Unfollow action. In this case, the software will visit people’s profiles and their data will be uploaded to the CRM and be available for export.
#3 Assemble profiles from Sales Navigator
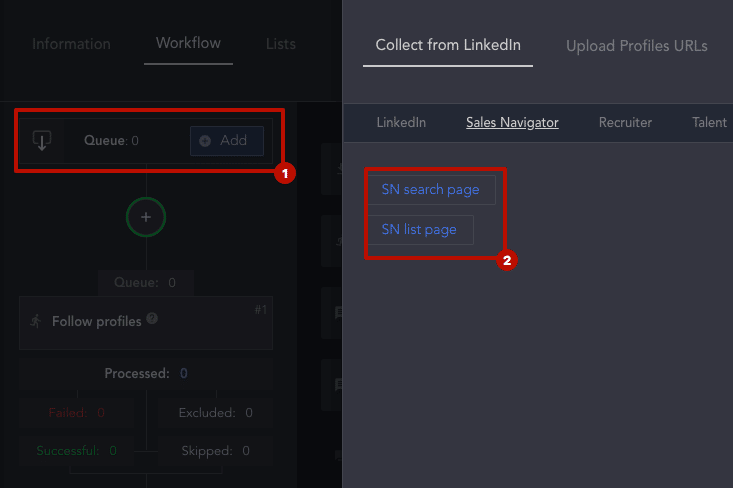
In the Workflow tab find the Queue section and click on the Add button. From the menu choose source→ collect from LinkedIn→ Sales Navigator.
Select one of the available options for collecting profiles – search page or lists.
After applying the advanced filters and the source page, on the left side of the control panel, select Queue → Collect from current page.
After a few minutes, the scanner will collect a selection based on your filters into the memory of the CRM. It will remain there even if you lose access to Sale Navigator.
#4 Campaign launch
To parse people’s data from the Queue list, select the Start button in the Workflow tab or on the left side of the screen in the menu.
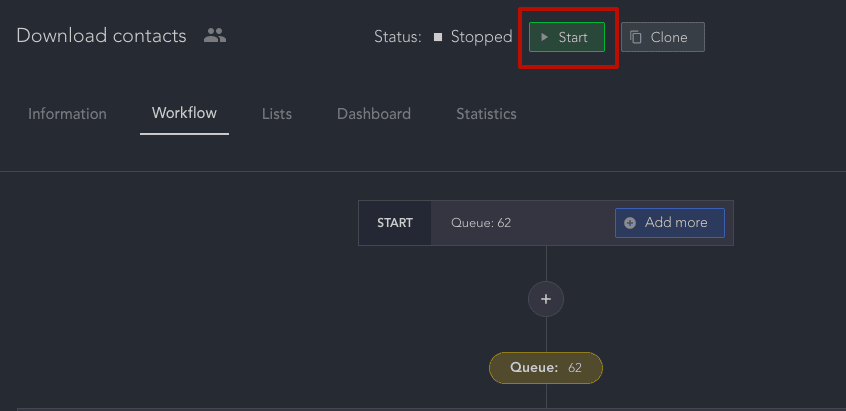
After that, all visited profiles will be transferred to the Successful section.
#5 Download data after parsing
If you want a collection of profiles in the form of a spreadsheet, go to the Successful section and proceed to download. The exact instructions for working with the spreadsheet are given in the tooltip in the pop-up window.
Explore more technical hacks on the support line – https://linkedhelper.zendesk.com/hc/en-us